Do you remember this "old guy" (the white folded cardboard)?
Well, if you still have it, I suggest you to grab it to start the project I'm going to show you today! In the case you don't have it, instead, I propose you to read my last tutorial, that you'll find on my "Make it!" page and that is make a chunky tassel ! Follow the instructions both for the cardboard measurements and for the tassel, until this one is free from the cardboard....then follow me!!!
You'll need to complete two yarn dolls (girl and boy):
after 30 wraps, cut the strands
thread the tapestry needle with some strands, slide them under the tassel/doll
cut the tassel/doll at the bottom
adjust the tension of both arms and legs, then tie a second tight knot and trim your new doll
Well, if you still have it, I suggest you to grab it to start the project I'm going to show you today! In the case you don't have it, instead, I propose you to read my last tutorial, that you'll find on my "Make it!" page and that is make a chunky tassel ! Follow the instructions both for the cardboard measurements and for the tassel, until this one is free from the cardboard....then follow me!!!
You'll need to complete two yarn dolls (girl and boy):
- yarn (more colours the better!)
- a piece of cardboard (see characteristics here)
- a big tapestry needle
- a pair of scissors
- 4 buttons for the dolls' eyes
- some cotton thread to sew the buttons on
- glue (optional), to add a dab at each knot around wrists and ankles
after 30 wraps, cut the strands
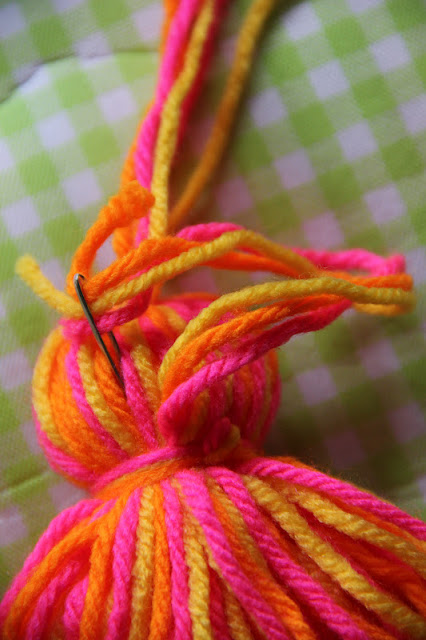
thread the tapestry needle with some strands, slide them under the tassel/doll
cut the tassel/doll at the bottom
free your tassel/doll
now you can make a second tight (!!) knot on the top/head of the tassel/doll
with some extra strands we can define the head of our doll
pass the upper strands under the yarn "chocker" (in yhe previous tutorial I didn't take any pictures of this passage...sorry!!)
Our "tassel" is now ready to be transformed in a cute "girl doll".....let's do it!!
separate, from both sides, some strands to make the doll's arms and try to make them with a similar thickness
add a "belt" to outline her waist
tie the knot for the belt twice and repeat the same procedures as for the neck
turn the doll upside down and trim her skirt
now we can define both the arms and the hands of our little lady! Cut shorter strands to tie as wrists. I prefer to tie loosely the first knot, as in this way you can still adjust the tension of the arms, pulling cautiously the strands. After checking that, you can tie a second tight knot!!
trim the tips of both the hands
...I think our girl needs a friend now, so .....
another tassel/doll is ready!! This time for a boy doll!
Infact, when the belt is knotted, you have to separate the skirt in two halves, so that your boy will wear a pair of trousers!!!
tie 4 loose knots
adjust the tension of both arms and legs, then tie a second tight knot and trim your new doll
....a couple of happy friends is born!!!
I've sewn even a pair of buttons (as eyes) on each doll
I think they are pretty cute....don't you, too??
I love the idea that these yarn dolls can be nice soft toys or lovely decorations (imagine something like a yarn dolls chain..!!), or even a nice pin..!!!
Even today I'm joining Welcome to Craft Schooling Sunday! at http://www.creativejewishmom.com/ !!!
Please come with me and have a look to all the nice crafts linked! Thank you!
see you soon, xxxx


love it! such a reminder of my childhood! thanks so much for sharing on Craft Schooling Sunday!
ReplyDeleteI have been making dolls like this for many years and still enjoy making them, you can make a broom as well and turn one to a a witch on a broom !!!
ReplyDeletemirjam
I have been trying so hard to think of a small inexpensive doll to put into the Samaritan's Christmas boxes that also wouldn't take hours to put together. Thank you for reminding me of these long ago made sweet little dollies. Such a good reason to use the yarn left over from my many crocheting projects.
ReplyDeleteTrès joli modèle !
ReplyDeleteMonique
Merci' Monique!
Deletexxxxxx ale