I told you!!!! Our "granny squares adventure" is not yet completed!!!!
First of all you need to group some yarn, a hook, a pair of scissors, a tapestry needle, some ribbon, a little branch (and some acrylic colours if you want to decorate it!) and pom poms !!!
You have to crochet a basic granny square. If you like you can have a look at my tutorial here!


As you can see, this time, I worked 9 rounds for my granny square. Each corner is done with 2 chains, not 3 and each round is closed with the invisible join, not with the slip stitch.
You can choose to make your granny even bigger or smaller than mine! It's up to you, honestly!
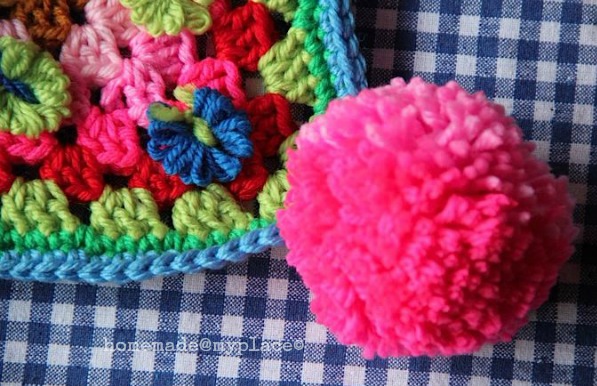
To complete my granny, I decided to border it with 2 rounds with single crochet stitches (remember : I use the american crochet terminology!) in 2 different colours. In each corner, I did 2 SCs!!


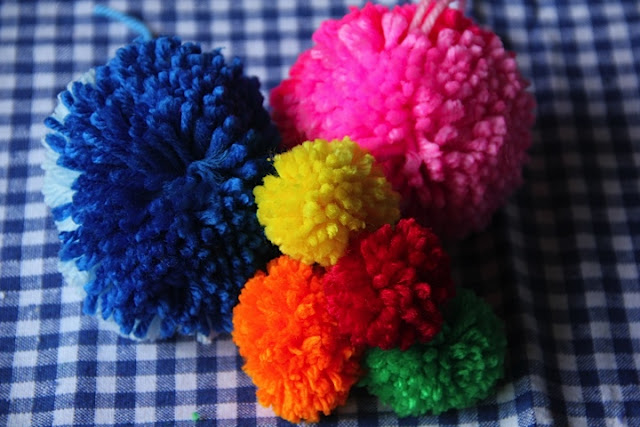
With some fluffy yarn and the pom pom makers do some colourful pom poms

I'm going to use them to decorate my panel (do you remember this one or this one, too????) !!!
But these are not the only decorations I'm going to attach to it.....oh, no....!!!!
I will add even some butterflies : do you remember my sweet chubby butterfly ???
....Even these ones, still so popular.....


Add everything you choose (or you prefer to let your panel plain? Why not? It's ok!!!)! I had to do simple knots for the tiny butterflies (choosing for each of them the same yarn of their bodies)

Remember to paint your little branch/stick before to slide it in the top of your panel

Some more knots for the pom poms at the bottom...


....and for the little ones at the top, beside the ribbon (to hang the panel!)...


...and look for the right spot where let it hang...!!!!!....


xxxx Alessandra
today links : Creative Friday and Link your Stuff!!!
First of all you need to group some yarn, a hook, a pair of scissors, a tapestry needle, some ribbon, a little branch (and some acrylic colours if you want to decorate it!) and pom poms !!!
You have to crochet a basic granny square. If you like you can have a look at my tutorial here!


As you can see, this time, I worked 9 rounds for my granny square. Each corner is done with 2 chains, not 3 and each round is closed with the invisible join, not with the slip stitch.
You can choose to make your granny even bigger or smaller than mine! It's up to you, honestly!
To complete my granny, I decided to border it with 2 rounds with single crochet stitches (remember : I use the american crochet terminology!) in 2 different colours. In each corner, I did 2 SCs!!


With some fluffy yarn and the pom pom makers do some colourful pom poms


I'm going to use them to decorate my panel (do you remember this one or this one, too????) !!!
But these are not the only decorations I'm going to attach to it.....oh, no....!!!!
I will add even some butterflies : do you remember my sweet chubby butterfly ???
....Even these ones, still so popular.....


Add everything you choose (or you prefer to let your panel plain? Why not? It's ok!!!)! I had to do simple knots for the tiny butterflies (choosing for each of them the same yarn of their bodies)

Remember to paint your little branch/stick before to slide it in the top of your panel

Some more knots for the pom poms at the bottom...

....and for the little ones at the top, beside the ribbon (to hang the panel!)...


...and look for the right spot where let it hang...!!!!!....


xxxx Alessandra
today links : Creative Friday and Link your Stuff!!!
It looks cute and colourful !!
ReplyDeleteWhat a sweet idea!! So colorful and funny, it's a good-mood-panel :-)). Have a wonderful weekend!! xxx Nata
ReplyDeleteIt's cute, very colorful - makes you smile when you look at it. :)
ReplyDeleteA very happy granny square panel! :) x
ReplyDeleteA good idea!
ReplyDeleteAnd thanks again for Giveaway... I looooooove the book!
Kisses!!!!
So cute!! You always come up with such sweet ideas!! xo Heather
ReplyDeleteGorgeous, the colors are awesome as always! Jxxx
ReplyDeleteChe allegria questo pannello, proprio simpatico e veramente unico!
ReplyDeleteTi auguro una buona domenica
Maddalena
owwwwwwwwwwwwwww my ♥♥♥♥ great work
ReplyDelete@ Jenneke : thank you, again !!!! xxxxx Ale
ReplyDeleteCrazy :) I love it!
ReplyDeleteJutta
glad you like it!!!!! ;oD
Deletexxxxx Ale