This morning I went upstairs in Tobia's bedroom with the sunburst circles (see this post here) and I asked him, please, to line them up the way he liked most...


Then, I cut 10 stripes (each 10 cm long, approx.) from a navy-blue&white gingham ribbon reel


So, I knotted each stripe to a circle on a long yarn chain ( I didn't measure the gap between each circle)


After the knotting moment, I used my "zig zag" scissors to stop all the fraying from the stripes


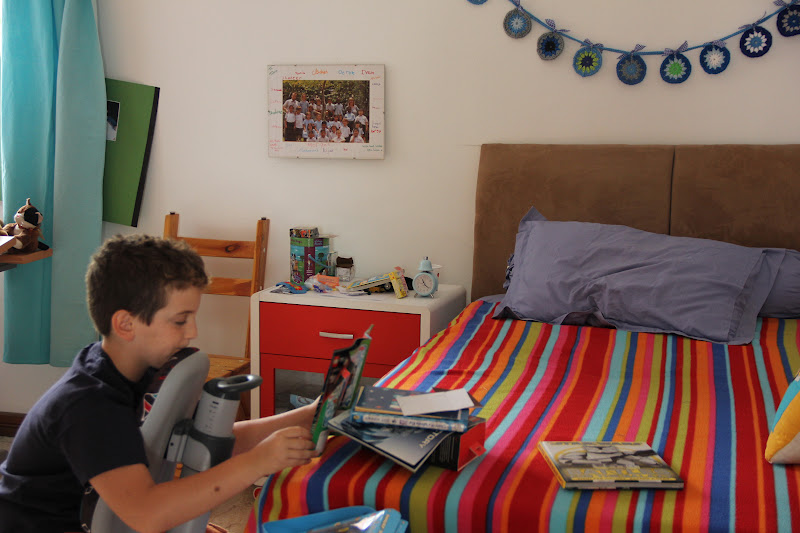
Tobia hammered (omg!!!) a couple of nails in the wall, just above his bed header (under the constant supervision of both mum and dad !!!)...

After checking all the fingers were safe and sound, we decided to put the bunting in place


...Hope the boy is as happy as I am!!!! ;oD

See you soon, xxxx
P.S. : Link your Stuff is waiting for me!!! You, too!!! Thanks!!!


Then, I cut 10 stripes (each 10 cm long, approx.) from a navy-blue&white gingham ribbon reel


So, I knotted each stripe to a circle on a long yarn chain ( I didn't measure the gap between each circle)


After the knotting moment, I used my "zig zag" scissors to stop all the fraying from the stripes


Tobia hammered (omg!!!) a couple of nails in the wall, just above his bed header (under the constant supervision of both mum and dad !!!)...

After checking all the fingers were safe and sound, we decided to put the bunting in place


...Hope the boy is as happy as I am!!!! ;oD
See you soon, xxxx
P.S. : Link your Stuff is waiting for me!!! You, too!!! Thanks!!!
I love it - it looks great hanging on the wall above the bed. :)
ReplyDeleteLooks great on the wall! (I love your son's bedside table as well!)
ReplyDeleteHave a great weekend!
Kate :}
Just catching up here.
ReplyDeleteI loved all your wonderful stroll pics and the bunting is delightfully boyish.
Always good things here :D
I really Love it! Looks so great!
ReplyDeleteLove, Miriam
I love it, glad your Son appreciates the finer things in life! Ada :)
ReplyDeleteI think Dear Tobia likes his wall hanger.. It is so beautiful.. I have showed your very beautiful blog to my mother and my daughter just now.. My mother was so curious what you crocheted or knitted. And she looked your blog very long time...
ReplyDeleteShe told her best regards to you and your sweet family..
Happy weekend...:))
circles and stripes, good combination! Nice blues for your son. Good photography on your walk around Jakarta, looks like an interesting place, Heather x
ReplyDeleteVery cute bunting! I love the colour combinations too - looks just fab in Tobia's bedroom :) :)
ReplyDeletevery cute! you are so creative alessandra.
ReplyDeleteI love it! Have to learn how to crochet soon!
ReplyDeleteYeah, ready! Looks great on the wall :-). And how nice that your boy likes your crochet!
ReplyDeletethat is such a pretty garland! beautiful Alessandra!
ReplyDeleteLove the colors! And that your boy put it in his room--how sweet! Great idea with the checkered ribbon, too!
ReplyDelete